Connecting iiko or Syrve
What you'll need to connect, where to get it, and how to check that the connection works.
Where it is: Settings: the iiko connection →
about 5 minUpdated October 4, 2026
Without a connection to iiko, the service can only recognize photos — there's nowhere to send the incoming invoice. This is the first step, and the only one where you might need help from your iiko server's administrator.
What to ask your iiko administrator for#
If you didn't set up the server yourself, send this list to whoever manages it. Three lines, nothing else needed:
| What you need | What it looks like |
|---|---|
| Server address | https://name.syrve.online/resto, or your server's address with /resto at the end |
| Login | A separate user for the integration, not your personal one |
| Password | For that login |
The user needs rights to read the catalog and create incoming invoices. Administrator rights aren't required.
Tip
Ask for a separate user set up for the integration, rather than handing over your own work login. That way you can always see in iiko which documents the service created, and you can cut off access with a single action, without touching anything else.
About the license slot#
iiko counts simultaneous connections. The service logs in, does its job, and logs out right away — it doesn't hold a slot for long. But if every license is already taken by staff working in BackOffice, the connection will fail — and at that moment you'll see a connection error even though the login and password are correct.
Important
Syrve and iiko are the same product under two names. If you run Syrve, everything here applies to you exactly the same.
Connecting in the setup wizard#
Right after sign-up the service opens the setup wizard, and iiko is its first step. Enter the server address, login and password and click Connect: the service checks the connection and saves the details only if the login worked. If something is wrong, the error appears right next to the field, with a hint on what to check.
Once connected, products and storages load in the background, and you can carry on with the wizard without waiting for it to finish. If you don't have the details yet, click Set up later — you can connect iiko at any time in Settings → iiko connection, as described below.
How to connect#
- Open Settings → iiko connection.
- Fill in the Resto API server address, the Login, and the Password.
- Click Check connection — the service logs into iiko and logs out right away.
- If the check passes, click Save.
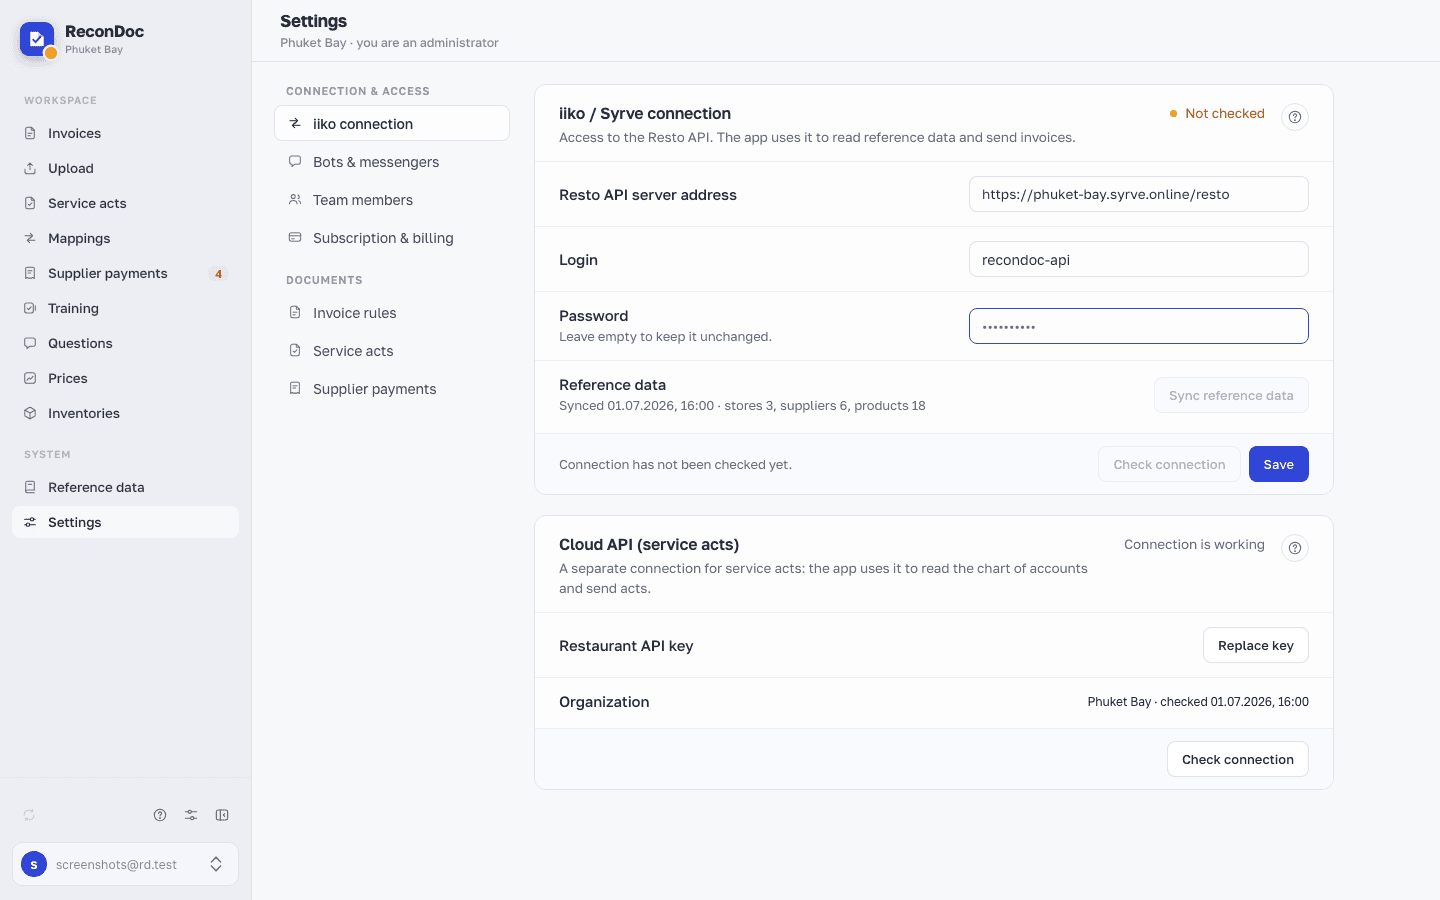
After saving, the card header shows the status (Connection is working or Error), the footer the date of the last check, and the Reference data row the date of the last sync with a Sync reference data button. What every field means, and how to read a failed check, is covered in Settings: iiko connection.
Careful
The password is stored encrypted and never shown anywhere — not to you, not in logs. If you forget it, there's no way to recover it from the service; you'll need to set a new one in iiko.
Done. What's next?#
The connection is there, but the reference data hasn't loaded yet — the service doesn't know your products or suppliers yet. That's the next step, and it takes a couple of minutes.
What's next
Didn't find the answer, or the guide didn't help?
Ask support