How to create a service act: from upload to sending
Step by step — set up the section once, upload a photo or PDF of the act, check the services and expense accounts, and send the act to iiko.
Where it is: Service acts →
about 5 minUpdated October 10, 2026
Once the section is set up, getting an act from a photo into iiko takes a few minutes: upload the file, check the services and expense accounts, send. No need to type the act into the back office by hand. The rest of this article just says "iiko": for a restaurant on Syrve everything is the same, only the buttons say "…to Syrve".
A service act is the document you get from rent, cleaning, advertising or repairs — from a supplier that sells a service rather than goods. In iiko it becomes an incoming service act, not an incoming invoice, so it lives in its own "Service acts" section.
1. Once: set up the section#
The restaurant owner does this, once.
- Turn the section on. Settings → Service acts, the "Service acts" card: turn on the "Turn the section on" toggle. "Service acts" appears in the sidebar.
- Connect the Cloud API. Acts reach iiko through a separate key, not the regular connection. Settings → iiko connection, the "Cloud API (service acts)" card: "Connect", paste the key, "Check and save", choose the organization. Where to get the key and what the statuses mean — see Connecting the Cloud API.
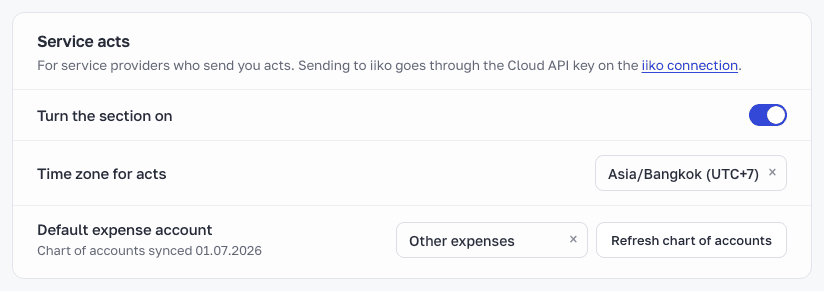
- Set the time zone and account. Go back to Settings → Service acts: choose "Time zone for acts" and "Default expense account". If the account list is empty, click "Refresh chart of accounts".
 1234
- "Turn the section on" — turns the section on for the restaurant.
- "Time zone for acts" — the act date is sent to iiko in this time zone.
- "Default expense account" — filled into new act lines.
- "Refresh chart of accounts" — pulls the expense accounts from iiko.
Important
Services and suppliers come from the iiko catalogs; ReconDoc doesn't create them. If there is no "Rent" service or no such supplier in iiko, add it in the back office and click "Sync" in Reference data.
2. Upload the act#
Open "Service acts" and click "Upload service act". The regular upload page works too: set the "Invoice / Service act" switch at the top to "Service act". The switch is always visible when the section is on. If the Cloud API key isn't ready, a banner explains why, and act files can't be added yet. Finish setup or switch to invoices, which upload as usual.
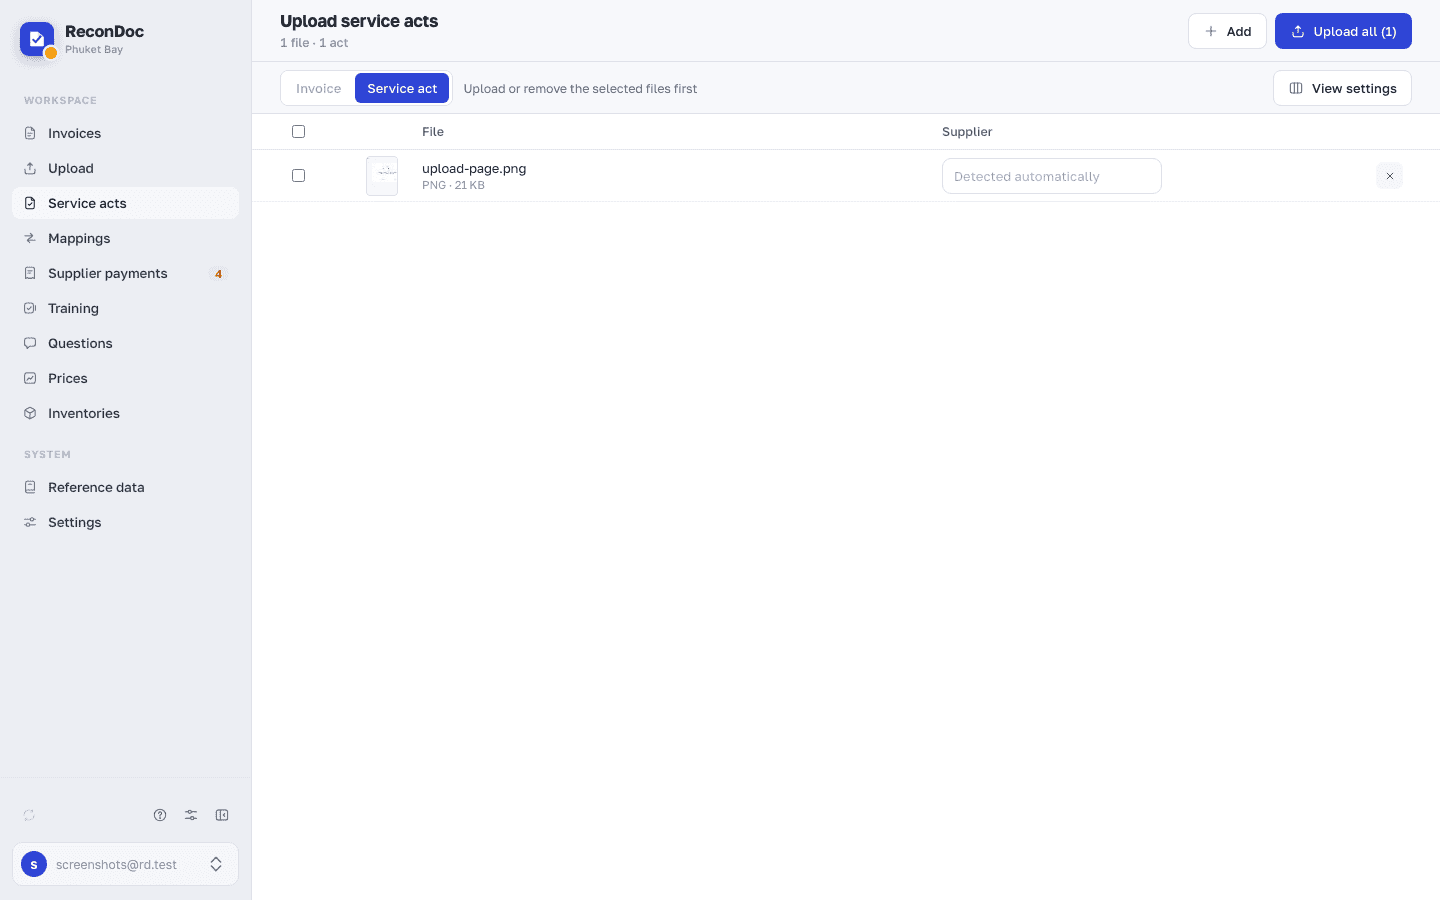
Drag a photo or PDF of the act into the window, or paste a screenshot from the clipboard. Each file becomes a separate act. You can give a supplier hint in advance or leave it on "Detected automatically". Click "Upload all".
 12345
- Counter — how many files are in the list and how many acts they will make.
- "Add" — more files; you can also just drag them into the window.
- "Upload all" — sends the listed files for recognition.
- File row — thumbnail, name and size; the cross removes the file from the list.
- Supplier — a hint for recognition; if left empty, the supplier is detected from the act text.
If the "Upload service act" button is disabled with "A Cloud API key is needed." next to it, step 1 isn't finished. If only the time zone is missing, the label reads "Set the time zone for acts".
Tip
The Telegram bot doesn't take acts: anything sent to the bot becomes an invoice. Upload acts on the website.
3. Check the act#
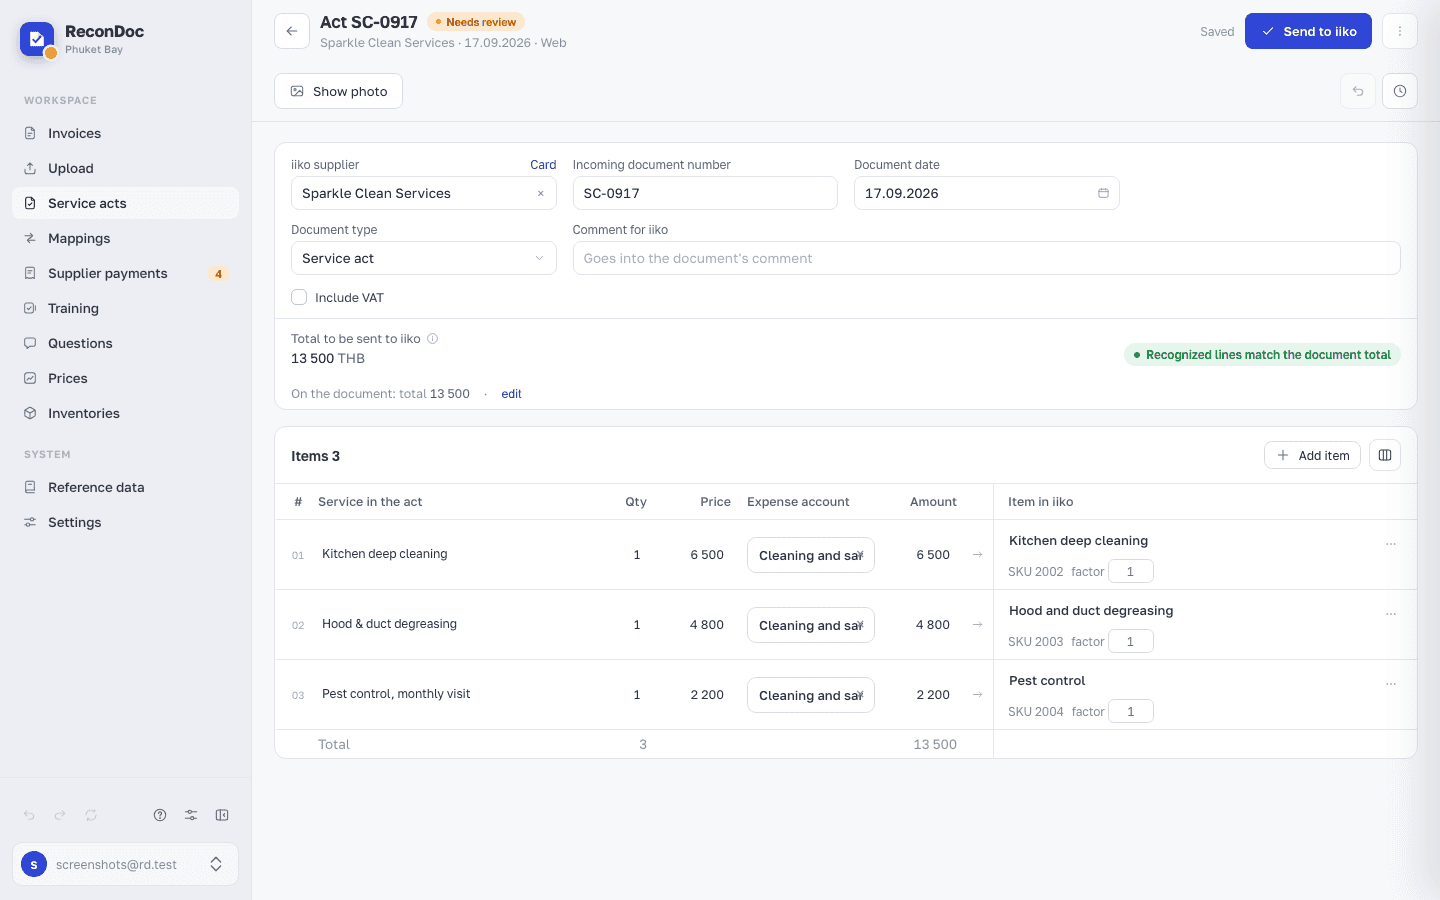
The act shows up in the list as Recognizing. When recognition finishes, the status changes to Needs review. Open the act.
 12345678
- "Send to iiko" — creates the act in iiko through the Cloud API.
- Supplier — the service supplier from the iiko directory.
- Incoming document number — the act number from the paper.
- Document date — the date of the act.
- Service in the act — the line as printed.
- Expense account — the account the service is charged to; the account from the settings is filled in by default.
- Amount — the line amount.
- Service in iiko — the service from the iiko catalog that the line is matched to.
What to check:
- Supplier, number and date match the paper. The supplier must be picked from the iiko directory.
- Every line has a service. Search and the candidates only offer catalog items of the "Service" type; goods and dishes don't show up there.
- Every line has an expense account. Need a different account than the default? Pick it in the line.
- The line amounts add up to the total on the paper. An extra line can be excluded.
An act has no store, container, discount or "Post" toggle: they don't apply to services.
4. Send#
Click "Send to iiko". If the button is disabled, the hint by the button says what's missing: the supplier, the date, a service or an account in a line.
The "Send the service act to iiko" window opens. The "Checked before sending" block shows whether every line has an expense account and whether the amounts add up. Below it is what ReconDoc will remember: the service and account for this supplier's lines. Next time they fill in on their own. Click "Send to iiko".
Careful
The act is created in iiko as not posted. Check it in the back office and post it there.
5. After sending#
The act's status changes to Sent to iiko. A sent act is locked in ReconDoc: the header and lines can't be changed, and it can't be sent again. Made a mistake? Fix the act in the back office.
To see whether the act has been posted in iiko, use the "Check statuses in iiko" button on the act list.
If the connection dropped and ReconDoc doesn't know whether the act was created, the card shows "The result of sending is unknown" and locks for editing. Click "Check the result" first, not "Send" again: that way iiko won't get a second act. What to do next — see Service acts, the section "The result of sending is unknown".
What's next
Didn't find the answer, or the guide didn't help?
Ask support